

How To Burn Photos To Dvd Windows 10
How to burn pictures to a CD or DVD on Windows 10 (4 easy ways)
This tutorial will evidence you step by pace how to burn pictures to a CD or DVD on Windows 10.
The steps on this page work for JPG (JPEG), GIF, PNG, SVG, BMP, TIFF, and other image formats.
How to fire photos to a CD or DVD in Windows 10 using File Explorer
1. Insert a blank CD into the CD/DVD burner drive of your PC.
2. Open Windows Explorer (File Explorer).
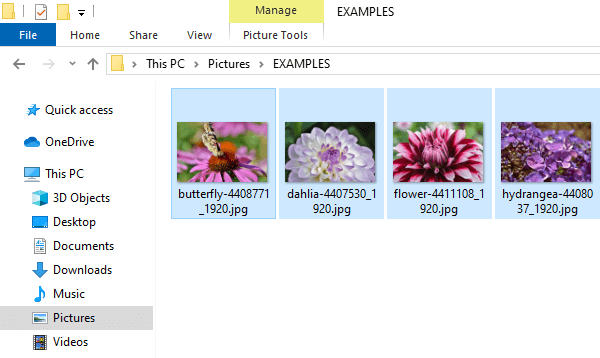
iii. Go to the location on your computer where the pictures are stored yous want to burn to a CD or DVD.
4. Select all the pictures or folders.
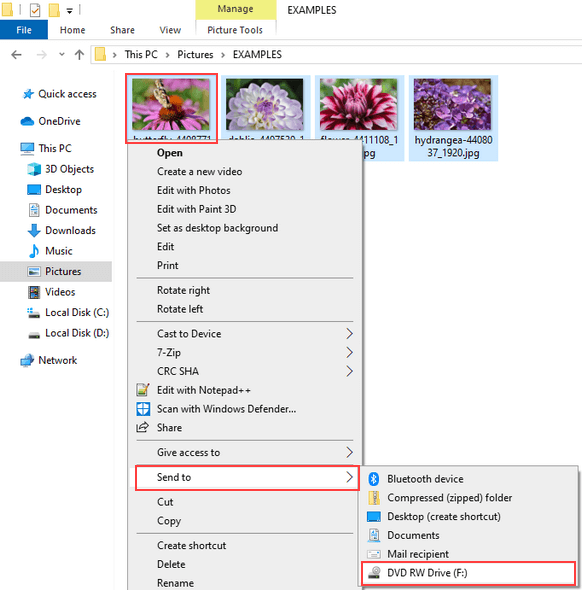
5. Correct-click on the selected photos or folders, go to Send to and and so click on your CD/DVD burner drive (eastward.g., DVD RW Drive (F:))
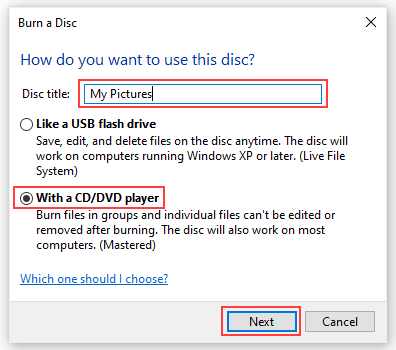
A "Fire a Disc" window volition appear.
6. At Disc title, you enter a title for your disc.
7. Select the With a CD/DVD Player choice.
8. Click on the Next push button.
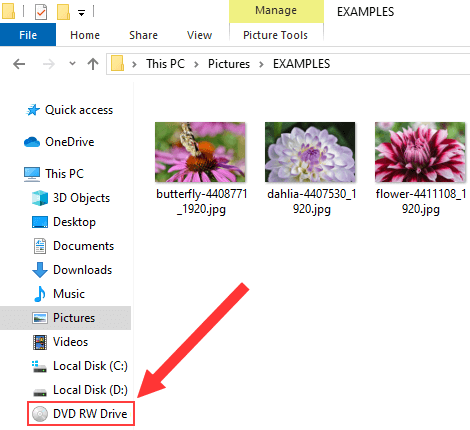
Windows volition now ship your pictures to the CD/DVD burner drive of your PC and when it'southward done, it volition open up the CD/DVD burner bulldoze in a new window.
If it doesn't open up the drive in a new window, and then open Windows Explorer (File Explorer) and and then click on the drive located in the left sidebar.
nine. When you lot're done copying pictures or folders to your CD/DVD burner drive, you click on Drive Tools located in the height menu of Windows Explorer.
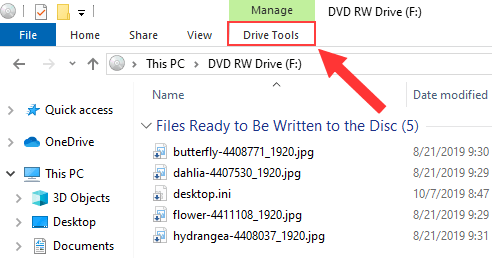
x. Click on Terminate burning.
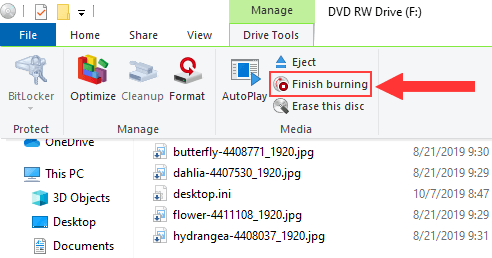
A "Burn to Disc" window will appear.
11. At Recording speed, you can select a burning speed. The maximum speed you lot can select depends on the capacity of the CD/DVD burner of your PC and the capacity of the CD or DVD.
12. Click on the Next button.
Microsoft Windows volition now burn your photos to a CD or DVD.
1. Insert a blank CD into the CD/DVD burner bulldoze of your PC.
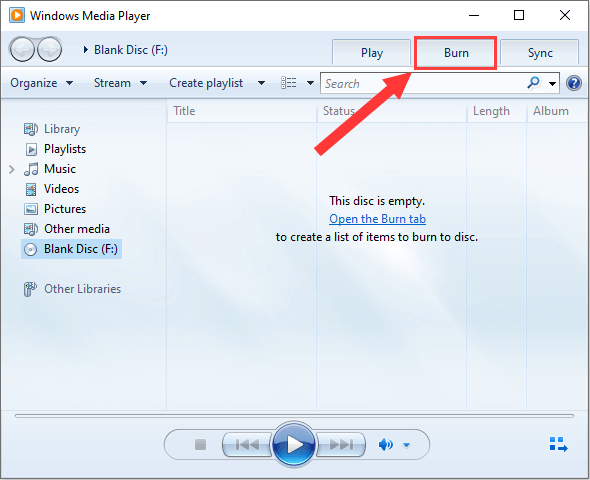
two. Open Windows Media Player.
3. Click on the Burn tab located in the elevation right corner of Windows Media Player.
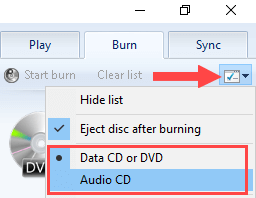
4. Click on the Fire options icon and cull Information CD or DVD.
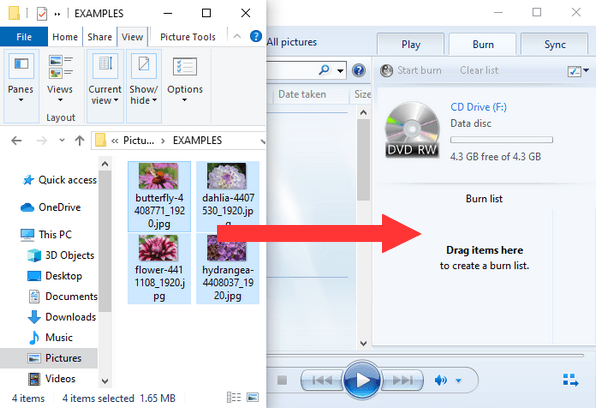
five. Open up Windows Explorer (File Explorer).
6. Go to the location on your PC where the pictures are stored y'all want to burn to a CD or DVD.
7. Make sure that the Windows Explorer window and Windows Media Player are both visible and located side by side to each other.
8. Drag the photos from Windows Explorer to the burn down list in Windows Media Player.
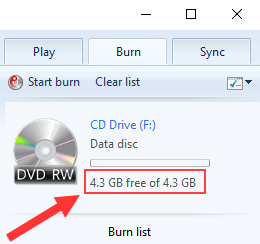
Notation: The total file size (MB or GB) cannot exceed the chapters of your CD or DVD (ordinarily 650 MB or 700 MB for CDs and 4.vii GB for DVDs).
Tip: You lot tin view the time in minutes or file size in MB y'all take left on your CD or DVD at _ MB gratis of _ MB (east.1000., 450 MB free of 702 MB) or _ GB gratis of _ GB located just above the Burn down list.
ix. When y'all're ready, you click on Start burn located above the Burn listing.
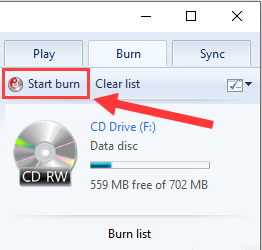
Windows Media Player will now burn your photos to a CD or DVD.
How to burn photos to a CD or DVD in Windows 10 using Ashampoo Burning Studio Free
Ashampoo Burning Studio Free is a free plan for called-for and copying CDs and DVDs and other disc-related tasks.
This program'due south user-friendly interface, carte, and pace-by-step wizard will help yous achieve your disc-related tasks, easily and quickly.
You tin can visit the product page for more information about the program and to download the program.
Visit product page
1. Insert a blank CD into the CD/DVD burner drive of your PC.
2. Open Ashampoo Burning Studio Free.
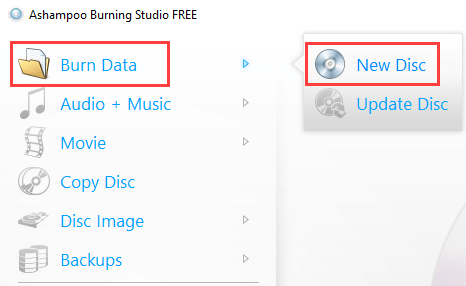
3. In the left menu, you move your mouse cursor (pointer) on Burn Data and and so click on New Disc.
4. Click on the + button located in the acme right corner of Ashampoo Called-for Studio Free.
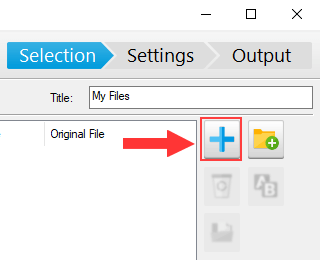
A "Add Files and Folders" window will appear.
5. Go to the location on your PC where the pictures are stored you lot want to burn down to a CD or DVD.
6. Select the pictures or folders.
7. Click on the Add button.
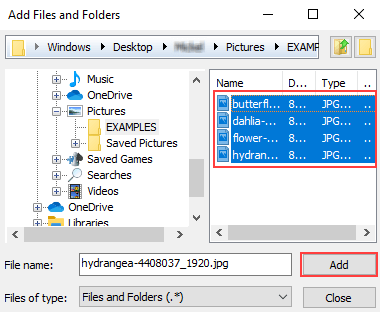
Tip: At Free Space on CD located at the bottom of Ashampoo Burning Studio Free, you can view how much MB in file size you have left on your disc (how many pictures you nevertheless tin can add to your disc).
viii. When you're done adding files or folders to your compilation, you click on the Shut button at the bottom right of the "Add Files and Folders" window to close it.
9. Click on the Next button located in the bottom right corner.
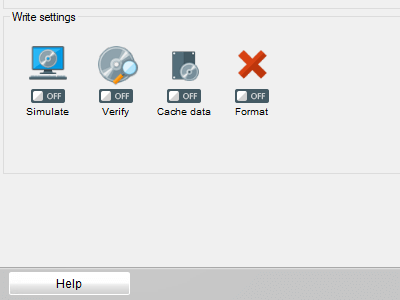
10. Now you will accept the following optional "write" settings in the bottom left corner:
- Simulate volition simulate recording earlier called-for
- Verify to verify written files and folders after recording (the content of the disc will be compared with the original files)
- Cache Data to copy all information to difficult deejay paradigm file starting time (slower, simply can prevent write errors)
- Format to format the CD or DVD
11. In the bottom right corner, at Speed, you lot can select a burning speed. The maximum speed you can select depends on the chapters of the CD/DVD burner of your PC and the capacity of the CD or DVD.
12. You can likewise select the number of copies. This selection is for people who want to fire more than copies of the CD or DVD.
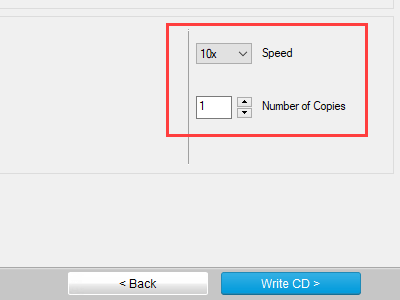
13. When you're set, you click on the Write CD or Write DVD push at the bottom correct.
Ashampoo Called-for Studio Costless will at present fire your photos to a CD or DVD.
How to fire photos to a CD or DVD in Windows x using Nero Burning Rom
Nero Burning Rom is a well-known program for called-for and copying CDs, DVDs, and Blu-ray discs, and other disc-related tasks.
It's easy to use and has a lot of actress features.
You can visit the product folio for more data about the program.
Visit product page
one. Insert a bare CD or DVD into the CD/DVD burner drive of your PC.
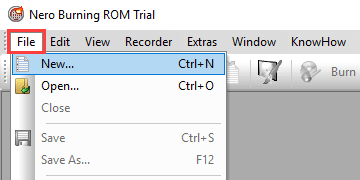
2. Open Nero Burning Rom.
A "New Compilation" window volition appear.
Note: If the new compilation window does not appear, yous click on File located in the tiptop left corner and and so choose New from the drop-downward menu.
three. Select CD or DVD from the selection menu located in the top left corner of the "New Compilation" window.
4. Click on CD-ROM (ISO) or DVD-ROM (ISO).
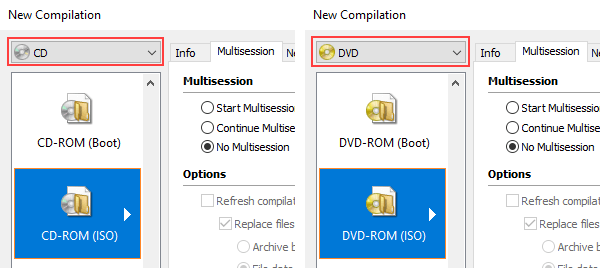
5. Click on the New button at the lesser correct of the "New Compilation" window.
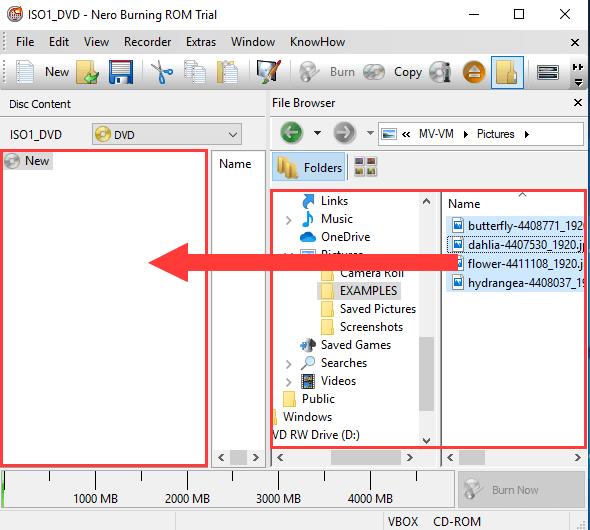
half dozen. In the right section of Nero Burning Rom, you get to the location on your calculator where the pictures are stored you want to burn to a CD or DVD.
vii. Elevate the pictures or folders from the right department (File Browser) to the left department (Disc Content).
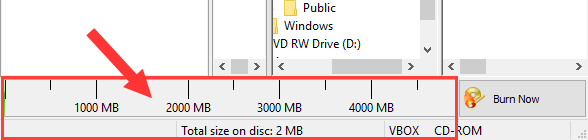
Tip: At the bottom of Nero Burning Rom you can view how much MB in file size you have left on your disc (how many pictures you still can add to your disc).
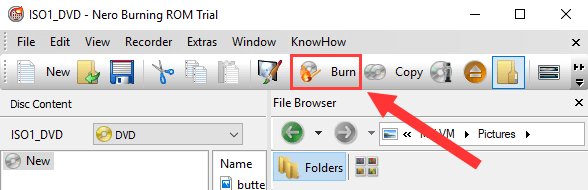
8. When you're ready, yous click on Burn located in the top tool bar.
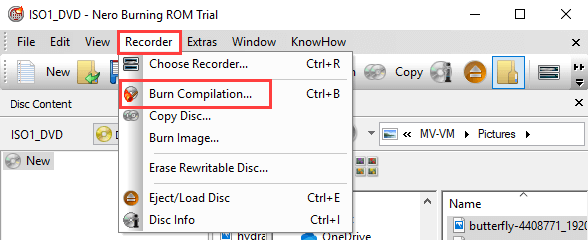
Or you click on Recorder located in the top bill of fare, and then click on Burn down Compilation.
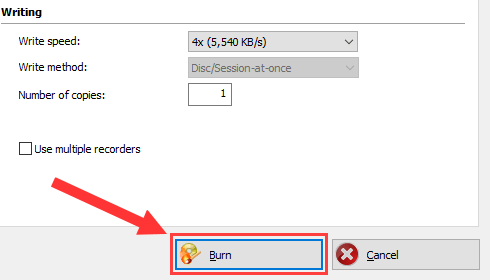
A "Fire Compilation" window volition appear.
ix. In the Writing section, at Write speed, yous tin select a called-for speed. The maximum speed y'all can select depends on the capacity of the CD/DVD burner of your PC and the capacity of the CD or DVD.
x. At Number of copies, you can enter the number of copies. This option is for people who want to burn more copies of the CD or DVD.
eleven. When yous're ready, y'all click on the Burn button at the bottom correct of the "New Compilation" window.
Nero Burning Rom volition at present fire your photos to a CD or DVD.
Perchance you lot're also interested in:
How to burn pictures to CD or DVD in Windows 10
How to crop a moving picture into a circle shape
How to resize multiple photos at once in Windows 10
How to merge multiple images into one PDF file in Windows ten
Source: https://www.easytechguides.com/burn-pictures-to-dvd-or-cd/
Posted by: reedthowite1944.blogspot.com
0 Response to "How To Burn Photos To Dvd Windows 10"
Post a Comment